Showing posts with label allergy mom. Show all posts
Tuesday, November 18, 2014

Kitchen Tip Tuesday! My Dairy-free Secret to Creamy Soups!

Who doesn't love a creamy soup?  I'm a huge fan of soup, nearly ANY soup, but especially of creamy soup.  The warm, filling, comfort of a creamy soup is hard to beat on a blustery Fall day, or in the midst of Lake Effect Snow - like today!  

The view from my kitchen! 

When dairy is taken out of the equation, it's sometimes difficult to get that creamy mouthfeel that I crave in a soup when the cold weather sets in.  There are several standard purees that can be added to a soup to make it "creamy," like pureed cashews - which doesn't work for this nut-free crowd, or potatoes, blended right into the soup.  Both are good, but I'm going to share my secret with you, are you ready?  Here it is: 


TA DA!!!!

Some of you might recognize this gorgeously odd looking veggie from the aisles of the produce department.  You might have filed it under "Things I don't know what to do with." Or, maybe it doesn't look familiar to you at all.  One of my friends and I were grocery shopping together when I bought this, and her exact words were "WHAT is THAT???"

I'll tell you what it is, it's CELERIAC!  Also known as "Celery Root," this underutilized gem of a vegetable is delicious as a mash, or even blanched and fried like a french fry.  It has a delicate celery taste and a potato-like texture.  But, it has a secret...it makes soup creamy!  This is my secret weapon!  I use it in any veggie base that I will be pureeing into a "cream" soup.  Here's how to get at the pale, lovely interior of celeriac. 


First, cut off the top stalks, and the bottom "bumpy" part, so it sits flat on the cutting board. Then use a knife to peel the thick exterior to reveal the surprisingly smooth, dense interior. 


Proceed to dice as you would a potato!  After
cooking them along with carrots and onions
for a soup base, add the broth and then puree with an
immersion blender!  The soup will be dairy-free and
have a delicately creamy texture! 
Now that I've let you in on my secret, you can start making creamy soups of your own!  Start by trying my Potato Leek soup, or simply replace the celery in your favorite Chicken Soup recipe, with one large bulb of diced Celeriac.  Before adding the chicken pieces, blend soup with an immersion blender for dairy-free, gluten-free "Cream of Chicken Soup!"


 As always, from The Allergy Safe Kitchen, I wish you "Good Cooking, and Safe Eating"!
Friday, November 14, 2014

Sunbutter Review

Today, I am reviewing SunButter sunflower seed butter.  I received some in my swag from the Food Allergy Bloggers Conference, but we also purchase SunButter frequently on our own. 


First I'm going to start with a little story.  My husband and I both loved peanut butter.  One of my specialties used to be a wickedly decadent peanut-butter cream pie, with a chocolate and rice krispie crust...I'll just pause for a moment while you salivate.  

When we went cold turkey after my son was diagnosed with peanut allergies, it took a loooooong time for us to find something to fill that void.  We tried quite a few "butters" that really didn't taste very good.  After tasting one of them, (which shall remain nameless), my husband looked at me and said, "Please don't buy any more of these.  Give up.  Please."   So, I did.  Until I heard about one called "SunButter."  I'm going to be honest, I don't remember who recommended it to me all those years ago, but if it was you - THANK YOU!  

I brought some home, opened the jar and inhaled the roasted scent, startled that it smelled so good. My husband and I actually ate it with spoons, right out of the jar, standing in the kitchen, moaning. True story. 


So now that I've got you on the edge of your seat, wondering what kind of review I'll give SunButter...

Pros:  Peanut free, tree nut free, gluten free, dairy free, and egg free.  Here's a direct quote from their website: 
"Processed in a strictly nut-free facility (Our employees aren't even allowed to bring in peanut butter sandwiches for lunch!)"It's a direct substitute for peanut butter - in baking, and in daily life. Sandwiches, on crackers, on a spoon, using an Enjoy Life chocolate bar to scoop it out of the jar...(NOT that I would EVER do something like that...especially during pregnancy...ahem, back to the review). 

Cons: Just one - Cost.  This stuff is pricey. As a family of nine, we go through a lot of SunButter, but it does impact the food budget. You can order it online, in regular jars, and in a 5 pound size.  You can save a little bit by purchasing it that way.  

Bottom line: Our family loves SunButter so much, that several of the recipes in my first cookbook feature SunButter as a key ingredient. It is a staple in our pantry, and I still sometimes eat it from a spoon straight out the jar, in the middle of the kitchen.  (And so do my kids!) If you're craving a nutty tasting peanut butter replacement, go get some SunButter!  It comes in several varieties; we typically use Natural, and Crunch. 


Chocolate Layer Cake with SunButter frosting! Recipes
for both components of this cake are in my first cookbook
"Love Letters from My Kitchen"

Chocolate SunButter Krispie No Bakes....This recipe is in my 
mini-cookbook: 12 Cookies of Christmas (Vegan edition also available!)

For information on the full line of SunButter products, click HERE to visit their website!


 As always, from The Allergy Safe Kitchen, I wish you "Good Cooking, and Safe Eating"!


Sunday, November 9, 2014

Hosting Thanksgiving: Homemade and Allergy Safe

My family, my inspiration for all my recipes.  For them, I give thanks. 

We gather around the table.  We give thanks.  Family and friends bond over the breaking of bread and the sharing of bounty. May we have another year of plenty. Amen.

Every person should be able to share in a delicious meal with their family and friends without fear or anxiety over food allergies and restrictions. 

I have found that I, as a food allergy mom, have less anxiety and more enjoyment of the holidays when I host the meal.  I know it seems like hosting can be a lot of work, and it is, but it allows control over the ingredients, and the kitchen in which the dishes are prepared.  And that, to me, is worth any effort - to know that my children are safe and can relax around the the table. No worries over Aunt Gertrude planting a big kiss on my dairy allergic pre-schooler after eating cheese laden potatoes, or over someone mixing up the serving spoons between safe and unsafe side dishes.  No relatives concerned that they have done something "wrong" or dangerous." No cross-contamination to be concerned over, no constant watching over my shoulder to keep an eye on the faces and mouths of my children...looking to spot the first signs of redness or swelling.  When I take the menu, preparation, and venue into my own hands, the result is more relaxing for everyone.  

I have found great joy and peace in hosting the holidays in our home.  The kitchen is filled with delectable smells for days, the children help with the preparation of the food, the decorating of the table, and the creation of crafts to adorn the dining room.  It can be a beautiful time for the whole family.  It can also be overwhelming and a LOT of work! And let's be honest, not everyone in the family has the same idea of "tidy" when it comes to preparing the living room for company!  But even considering all of that, the joy of hosting a safe meal is greater. 

Stick with me over the next couple weeks, as I lead you through making dishes ahead of time, so your actual Thanksgiving eve, and day, can be enjoyable and safe!  

Follow me on Facebook, Twitter, Instagram, and by e-mail to keep up to date with all the Thanksgiving preparations that are happening in The Allergy Safe Kitchen.  (Go to the top of the blog, the link buttons are all there! Don't forget to follow by email for grocery lists ahead of time, and additional tips and tricks!)  

Here are the links to the dishes and recipes I've shared already: 


 As always, from The Allergy Safe Kitchen, I wish you "Good Cooking, and Safe Eating"!


Tuesday, November 4, 2014

Kitchen Tip Tuesday! Double up

Convenience foods for food allergy families are expensive!  You name it - breakfast foods, snacks, main meals, desserts?  All pretty pricey.  One of my secrets to staying on a budget is to double up! Double the recipe you are making, and freeze the extra!  I have a kitchen cabinet dedicated to freezer containers.  I double everything I can (that freezes well), and it saves me time and money when time is short, and the budget is tight.  With seven kids, we are always on the go, and some nights I don't have the time to make a healthy, safe, dinner from scratch.  With a well stocked freezer, I know that I can get food on the table without a huge amount of time, or breaking the budget.


Here's what you need in order to become a "Freezer Diva!"

- Roll of masking tape
- Advanced planning to double at least one recipe each week (two is better) 

I use these "Pen Pal" pencil holders to keep my Sharpie and a pencil always on hand in the kitchen.  The holders just peel and stick right to the door.  I love not having to rummage around a junk drawer to get what I need.  The masking tape is always tucked right in there too! 

On a "Double Up" night, after your family enjoys the sumptuous meal you've prepared, portion out the leftovers into containers.  Use masking tape as a label, and write in permanent marker, not only the contents of the container, but a "Use by" date, and anything you'll need the day you bust out the frozen leftovers.  For example, if I freeze the veggie and meat mixture from a stir fry, I write "Stir-fry: needs rice" on the label. 

Be strategic about your portions.  Is it something that might be nice as a hot lunch?  Save in 2-cup containers for individual sized meals. Is it something that you'll want to heat up for the whole family? Make sure that the freezer container isn't bigger than the vessel you'll be reheating in! 

I can't tell you how many times using the "Double Up" method has allowed me to get a healthy safe dinner on the table on a super busy day.  Here are 10 of our favorite "Double Up" foods:

Pancakes (recipe in "Love Letters from My Kitchen")
Waffles (recipe in "Love Letters from My Kitchen")
Zucchini Bread (recipe in "Love Letters from My Kitchen")
Apple Bread
Kicked Up Sloppy Joes
Chicken Soup (freeze without noodles)
Potato Leek Soup
Turkey Slop (yep, it says slop...turkey in gravy, and then we serve it over a scoop of mashed                                     potatoes) *freeze just the turkey in gravy
Meat sauce 
Cookies (recipe in "Love Letters from My Kitchen")


Get started and "Double Up" a meal this week!  For additional freezable baked goods, get my cookbook, "Love Letters from My Kitchen!" Available here, or on Amazon!  


 As always, from The Allergy Safe Kitchen, I wish you "Good Cooking, and Safe Eating"!
Monday, October 20, 2014

Cauliflower Potato Soup


This soup is great on it's own or as a base for other dishes!  I serve it as a meal with some freshly baked bread, oyster crackers, or a salad. It's creamy and mild, which also makes it a great base for my "chicken-pot-pieless", casseroles, or any other "cream-based" soups that you might want to make dairy-free! 

*This soup recipe is peanut-free, tree nut-free, dairy-free, egg-free, soy-free, wheat-free, gluten-free fish-free, and shellfish-free. Top 8 Allergen Free! I've also included a vegan option! As always, check this ingredient list and your local products to make sure that this recipe is allergy safe for your family and/or friends!

Friday, October 17, 2014

Divvies Chocolate - Review


I recently attended the Food Allergy Bloggers Conference, in Las Vegas.  When I arrived to register at the conference, I was greeted with two bags of swag!  Coupons, pens, magnets, magazines, and oh so many samples of allergy friendly products!  Of course, I needed to do my duty to you, my dear readers, and try each sample...um, did I mention there were several varieties of chocolate?  Yum! So, I rolled up my sleeves and dug in. Today's review: Divvies Chocolate!


Included in our Swag, was a Divvies Crispy Rice Crunch Bar. I planned to just eat a little nibble, but...click here to see an Instagram of what was left of my Divvies wrapper as I was pulled into this divine treat!  (Don't forget to follow me on Instagram!) Here are my pros and cons:

Pros:  It's like a Nestle Crunch bar, but WAY better!  The Crispy Rice is delicate and just the right texture, and the chocolate has a creamy mouthfeel.  No waxiness in the chocolate, just rich and smooth! The chocolate is dairy-free, egg-free, and peanut-free. This unique little bar is divided up into parts: one for you, and one to share!  I love that concept in an allergy friendly food!  


Cons: I really don't have any cons for this one!  It's a winner all around! 


Bottom line:  This chocolate is top of the line and perfect for sharing!  I will most definitely be purchasing Divvies chocolate for my family! 


For more information on the whole line of Divvies products: click HERE to 
visit their website!  


Please read all labels when purchasing products for your food allergic family and friends, to ensure that the product meets your allergy needs.  


 As always, from The Allergy Safe Kitchen, I wish you "Good Cooking, and Safe Eating"!
Monday, October 13, 2014

Turkey Slop - I swear, it's better than it sounds.

When I was in high school, there was one meal that was legendary, and we called it "Turkey Slop." This might sound like a questionable moniker, but in reality there's just nothing wrong with a scoop of mashed potatoes, scooped out with an ice cream scoop, and hot gravy...with the Turkey. Right. In it. This is the warm comforting goodness of a Thanksgiving meal at its most efficient.


I have taken this humble meal and elevated it to a Fall family favorite in our home.  As soon as the leaves start to turn, and the air gets a little chillier, the kids start begging me to make Turkey Slop. And yes, I do use an ice cream scoop to dish out the mashed potatoes.

*This recipe is peanut-free, tree nut-free, dairy-free, egg-free, soy-free (using soy free Earth Balance), fish-free, and shellfish-free. As always, check this ingredient list and your local products to make sure that this recipe is allergy safe for your family and/or friends!

If you already have tried and true recipes for roast turkey, mashed potatoes, and gravy, then simply chop up the turkey meat and add it to the gravy.  Serve over mashed potatoes!  If you don't know how to roast a turkey, or need some assistance in the gravy department, keep reading!  If you need a recipe for mashed potatoes, click HERE! 

Ingredients for Simple Roast Turkey:

Whole turkey (I like to stay under 12 pounds)
Kosher Salt
Ground Black Pepper
Olive Oil
1/2 onion
1/2 lemon

Directions for Simple Roast Turkey:
*I make the turkey the day before I want to serve the turkey slop. No need to try to do everything all in one day!  Relax, take your time, enjoy the process!
  • Make note of how many pounds your turkey is before you throw away the packaging. 
  • Remove neck and giblet pack from turkey
  • Place the turkey, breast side up, in a roasting pan, pat the outside dry with paper towels.
  • Let the turkey sit (out on the counter) for about an hour (this will dry the skin out a bit, and yield a crispier skin, and bringing the meat closer to room temperature will yield a juicier turkey!) 
  • Preheat oven to 450 degrees F
  • Season the cavity with kosher salt and pepper
  • Stuff cavity with 1/2 an onion and 1/2 a lemon
  • Rub outside of turkey with olive oil and season liberally with kosher salt and pepper
  • Roast at 450 for 20 minutes, and then reduce heat to 350 degrees F
  • Continue roasting 13-15 minutes per pound at 350. *If the outside seems be getting too brown near the end of cooking, cover the breast of the turkey with some foil. 
  • Insert a meat thermometer into the outer thigh, inner thigh, and breast.  All places should have a temperature of 165 degrees F or above. 
  • Let the turkey rest before carving!
Ingredients for Simple Turkey Gravy:
*I make the stock early in the day.
Turkey stock (Click HERE for a crock pot stock recipe - substitute                  the word "turkey" every time you see the word "chicken")
Flour
Fat (dairy-free margarine, canola oil, turkey fat skimmed from the top of the turkey stock, schmaltz, etc.)

Directions for Simple Turkey Gravy:

To make a delicious gravy in a large amount or small amount, you need only memorize a simple formula: 2T fat + 2T flour + 1 cup stock = gravy!  

  • First, know how many cups of stock you have to work with, that will determine how much roux you will need to make.
  • Heat your stock to a gentle boil and in the meantime....
  • Make your roux.  The roux is the thickening agent, it is the combination of the fat and flour, cooked together. (Cooking the flour in the fat gets rid of that raw flour taste, and allows it to incorporate more smoothly into the stock.)
  • To make the roux, melt/heat the fat in a saucepan, and whisk in the flour.  *Equal parts fat and flour!  Cook for a couple minutes. 
  • Whisk the roux slowly into the stock and then bring the whole thing to a simmer.  It will start to thicken right away, and you can continue simmering away to continue thickening.  
  • Check your seasoning - gravy requires a decent amount of salt and pepper! 
  • Add in the chopped turkey and serve over a scoop of mashed potatoes! 
Trust me, this is heaven in a pot! 


 As always, from The Allergy Safe Kitchen, I wish you "Good Cooking, and Safe Eating"!
Thursday, October 9, 2014

Concord Grape Jam


Fall is in full swing in Upstate New York!  One of the amazing, fragrant offerings of this season is the dusty, gorgeous Concord Grape. A hefty amount of grapes arrived in our CSA crate, and I was inspired to try my hand at making and canning Grape Jam.  My kitchen has never smelled so sweetly delectable!  (Can you tell that I'm in love with the smell of Concord Grapes?)

*This recipe is peanut-free, tree nut-free, dairy-free, egg-free, gluten-free, soy-free, fish-free, and shellfish-free. As always, check this ingredient list and your local products to make sure that this recipe is allergy safe for your family and/or friends! 

Ingredients: Concord grapes (at least 2 quarts), water, sugar

Directions:

First, separate the skins from the pulp.  If you've never peeled Concord Grapes before, you're probably thinking that peeling all these little jewels will take FOREVER.  And while it does take a little time, it's not as hard as one might think.  Concord Grapes are a "slip skin" variety of grape, which means a little squeeze at one end of the grape, sends the pulp right out of the skin!  


Place the skins in one large bowl, and the pulp in another.  The pulp will have seeds, but you'll be separating those out after you've cooked it down, trust me, it's easier that way.


Cook the skins over medium-low heat for about 20 minutes, with just enough water to keep them from sticking to the bottom of the pan.  Cook the pulp down, over medium heat, until it is very soft.

Once the skins have cooked down, I like to use my immersion blender to break them up even more. (You can chop them before cooking them, but I find it to be VERY messy.)

I also use a potato masher to break up the pulp while it's cooking.

Strain the pulp through a mesh sieve (or use a food mill, if you're fancy like that), into the pot with the skins.  I prefer to use a wooden spoon to mash the pulp through, so I'm truly left with only the seeds and really stringy pieces in the sieve.

At this point you may want to stop and wipe the drool off of your chin so it doesn't contaminate the jam.  Oh, and resist the urge to put your face in the pot to smell the goodness...this stuff is hot! (Although, a "Grape Steam Facial" does sound like something you'd pay a lot for at a spa...)

Stir the skins and pulp together and add up to 6 cups of sugar per 2 quarts (starting measurement) of grapes. We prefer our jam to be a little more tart, so I cut the sugar to approximately 4 cups per 2 quarts.

Gradually bring the mixture up to a boil, and continue stirring until the sugar is completely dissolved. Continue stirring while boiling rapidly until the jam reaches the gelling point.  

I test the gelling point by placing a little jam on a cold plate and bringing it to room temperature by cooling it rapidly in the freezer. Once cooled, drag your finger through the middle, and see if the jam holds the separation you've made. 

Ladle into glass jars that have been warmed in a hot water bath. (Hot jam in cold jars = broken glass!!) 


*If you are planning on canning/preserving the jam, leave 1/4 inch headspace and process 15 minutes in a boiling-water canner. 


 As always, from The Allergy Safe Kitchen, I wish you "Good Cooking, and Safe Eating"!


*Photo credits: All photos taken by Aidan Van Horn
Wednesday, August 6, 2014

Dessert Hobo Pies


Ok, ok...wipe the drool off your face, and start gathering up the firewood for this camp classic!

At least once a summer, we break out the pie irons, and make pizza hobo pies.  We use homemade sauce, Earth Balance to grease the irons, safe bread, turkey pepperoni or sliced Al Fresco chicken sausage, and Follow your Heart Vegan Cheese Alternative.  Delish!

This year, we really wanted to make dessert pies too, and here's what we came up with:

*This recipe is peanut-free, tree nut-free, dairy-free, egg-free,  fish-free, and shellfish-free. As always, check this ingredient list and your local products to make sure that this recipe is allergy safe for your family and/or friends!

"Not S'mores"  (we couldn't come up with a better name, it was late...)

Ingredients: (makes 2 dessert pies)

4 slices white sandwich bread
Earth balance bars
graham crackers
enjoy life chocolate chips
Sunbutter - creamy
Dairy-free mini-marshmallows
Cinnamon Sugar
Cast iron pie iron (ours is a double, so that's how I'm writing this recipe)


Directions:
  1. Make a campfire!  Let it burn down a little.  You won't need a big flame, but you will need hot coals. Also, make sure you have a safe place to put the iron down when it comes out of the fire, and also a potholder or "Ove' Glove". 
  2. Heat the pie iron in the fire.
  3. Pull the iron out and open it.  Grease the inside of both sides of the iron with Earth Balance.
  4. Place two pieces of bread in the cavity of one side of the iron.  
  5. Place a graham cracker on each piece of bread.  Top generously with mini-marshmallows chocolate morsels.  
  6. Spread a layer of Sunbutter on the remaining two slices of bread and top off the sandwiches in the iron. 
  7. Carefully close the pie iron and place among the hot coals of the campfire.  Do not put the iron in the direct flames, it will burn the bread. 
  8. After a few minutes, flip the pie iron.  
  9. Cooking time will vary depending on how hot your coals are! Check after 5 minutes.  The pie is done when both sides are golden brown.
  10. Remove pie irons to your heat safe surface.  Open the irons and slather just the top side of the pie with Earth Balance.  Then, sprinkle on a generous amount of cinnamon sugar!
  11. Serve and enjoy!!!


 As always, from The Allergy Safe Kitchen, I wish you "Good Cooking, and Safe Eating"!


Tuesday, August 5, 2014

Kale Chips


So simple.  So healthy.  So yummy!  The joy of kale chips!  We got a LOT of kale in our CSA box this week, so we made some kale chips instead of popcorn for our family movie night! Get your kids in the kitchen to help rip some kale!


This recipe is peanut-free, tree nut-free, dairy-free, egg-free, gluten-free, soy-free, fish-free, and shellfish-free. Top 8 Allergen Free! As always, check this ingredient list and your local products to make sure that this recipe is allergy safe for your family and/or friends!

Steps marked with an asterisk (*) are child friendly!  
Click HERE for more information! 

Ingredients:

Kale
Olive Oil
Kosher Salt

Directions:

  1. Preheat the oven to 350 degrees F.
  2. *Remove kale leaves from their tough stems, and roughly chop into large bite sized pieces. 
  3. *Toss with olive oil, sprinkle moderately with kosher salt. 
  4. *Spread onto baking sheets in a single layer.
  5. Bake for 12-15 minutes. 
It really couldn't be easier to make this healthy snack!  My 10 year son is getting braces, and popcorn will no longer be on the movie night menu for him.  I felt so proud when he exclaimed (with genuine excitement): "At least I can still have kale chips on movie night!"


 As always, from The Allergy Safe Kitchen, I wish you "Good Cooking, and Safe Eating"!


Saturday, July 12, 2014

Kicked Up Sloppy Joes


Who doesn't love Sloppy Joes?  This is an often requested dinner in our house.  Here's my original recipe for Kicked Up Sloppy Joes.  I replace the "pre-made" Manwich sauce with tomato sauce and spices for a relatively additive-free meal!  I also use organic ground beef for a more tender texture and frankly, better flavor.  (Ground turkey works well too.) Organic meats can be expensive, but buying organic ground meat is a budget conscious way to get a higher quality meat into the menu rotation, even for a big family like ours!

*This recipe is peanut-free, tree nut-free, dairy-free, egg-free, gluten-free, soy-free, fish-free, and shellfish-free. As always, check this ingredient list and your local products to make sure that this recipe is allergy safe for your family and/or friends!


Ingredients:
2 pounds organic ground beef
1 15oz.can tomato sauce
1 15 oz. can fire roasted diced tomatoes
3 Tbsp. Tomato paste
1/2 tsp onion powder
1/2 tsp garlic powder
1 red bell pepper, diced
1 yellow bell pepper, diced
1 poblano pepper, diced
1 large sweet onion, diced
4 cloves minced garlic
chopped parsley
kosher salt

Directions:
1. In a large skillet, brown the ground beef. Remove from skillet,
    and set the beef aside.
2. Sauté peppers and onions until slightly softened.
3. Add garlic and sauté for 1 more minute.
4. Add beef back into the skillet.
5. Add 2 cans tomatoes, onion powder, garlic powder, and a
    hefty pinch of kosher salt.
6. Heat through, finish with parsley and serve! (Serve on top of      
    your family's favorite buns!)


 As always, from The Allergy Safe Kitchen, I wish you "Good Cooking, and Safe Eating"!


Friday, June 6, 2014

Can I make you a meal?

Food is a language.  We speak it in our family, our community, our culture.  We speak a language of celebration through food at birthday parties, holidays, awards banquets, date nights, graduation dinners, and any number of accomplishments that deserve a "special meal".  We speak a language of community through food in church potluck suppers, fundraiser pancake breakfasts and spaghetti dinners, neighborhood barbeques.  Every culture is loaded with food that speaks a distinctive language of spices, textures, techniques, and flavor profiles.   The tradition of breaking bread together is universal.  It strengthens the bonds of a family, or of a community, of a culture. 

So what happens when food allergies change the way we participate in that food conversation?  Well, a lot happens.  People may feel left out, put out, worn out, and decide to just sit it out.  I'm sure we could share countless stories of family members and friends who just don't understand, church or school functions that become a stressful maze of dangers to be navigated, and traditions that seem impossible to carry on and pass down in a safe way.  The honest truth is that the weight of food allergies is sometimes heavy and burdensome. Sometimes the weight of life events are heavy and burdensome too, or in other cases, happily unwieldy. When that happens, my instinct is to cook.  To nourish and feed the soul through food. 

I don't know about you moms out there, but nearly every "moms group" I have ever belonged to has a well oiled automatic "food brigade" that rolls into action with every birth, death, and major life event in the families of the member moms. "Judy had her baby?  I'll make her a meal!", "Norma's father died?  I'll make a meal for her.", "Susie's husband will be out of town for a month?  I'll bring her a meal while he's gone!"... does any of this feel familiar?  

When we had our twins, so many people  asked if they could cook for us, and truthfully, most of the time I turned them down. It's too hard to know if someone REALLY understands that "just a little", or even just cross-contamination could send us to the ER. Nearly all the women whose offerings I accepted and fed to my family have food allergic children of their own.  Unfortunately, the people who offer and get turned down get their feelings a little hurt, and that's not good either. So what's the answer?  Well, there are a few ways to handle this without hurt feelings, and without isolating yourself and your family in times of "big life stuff". 

First, get prepared for the people who want to help, but don't understand how to safely cook for your family.  Make a list.  Make a list of things that would be helpful that don't include cooking. The list might include things like:
- taking your kids to the park, to give you a break,
- coming over in the evening and folding laundry with you and
  keeping you company,
- ask if they would be willing to go to the grocery store for you,
- in the case of a death in the family - ask a few close friends to
  make phone calls for you,
- in the case of a birth, ask someone to come and hold the baby so
  you can take a shower!
- anything that would ease your burden or make life a little easier.

Then, get prepared for the people who want to help, and that you trust to cook for your family.  Have a file saved on your computer that lists your family's food allergies.  When someone you trust to cook, calls and says "Can I make you a meal?" say YES!, and send them the file as a reminder of the foods that need to be avoided.

Last, but not least, cook for others!  We all build up that network of food allergy families in our lives, so be sure to cook for them when the going gets tough! They are probably saying "no" to countless, well-meaning friends, so be the friend they can say "yes" to!

Here are my tips for making a meal for a food allergy family:

- Ask for a list of foods to avoid.
- Use new containers of ingredients if possible, to avoid the risk of 
  cross-contact.
- Double check the labels on all ingredients you will use.
- Make something freezer-friendly.
- Freeze in a family sized portion, and also in a few individual sized
  portions so a family member can grab a quick hot lunch.  (This is
  especially helpful for new moms, and nursing moms!)
- Use disposable freezer containers so no one has to get a dish back
  to you!
- Write out the list of ingredients (including brands), or the recipe,      and attach it to themeal, so the family knows exactly what's in the    meal.  During times of stress, what you say on the phone or at the    door about the ingredients might not be remembered when it's          time to make dinner.


 As always, from The Allergy Safe Kitchen, I wish you "Good Cooking, and Safe Eating"!
Wednesday, March 5, 2014

Epic Tomato Soup


I am generally not a fan of tomato soup.  I REALLY don't like tomato soup out of can, and I was hesitant to try this next recipe.  BUT!...I knew I needed a few new "go-to" meatless recipes for Lent, and I am always encouraging my children to give the new menu offerings at our house a fair try, so I jumped right in!  I'm thrilled to report that I love this soup and it was a cinch to make!

*This recipe is peanut-free, tree nut-free, dairy-free, egg-free, fish-free, and shellfish-free. As always, check this ingredient list and your local products to make sure that this recipe is allergy safe for your family and/or friends!

Ingredients:

4-5 TBSP bacon fat
4 finely diced onions
6-8 cloves of garlic
8 cups chicken or vegetable stock
2  28oz. cans San Marzano tomatoes
Pinch crushed red pepper flakes
1 cup orzo or ditalini pasta
2 TBSP corn starch mixed with 2 TBSP cold flax milk
2 tsp Kosher salt

Directions:

1. In a large Dutch oven, heat the bacon fat.  Add onions and cook
    on medium-low until soft and just golden.  10-15 minutes,
    stirring occasionally.  Add garlic and crushed red pepper flakes,
    and cook for one more minute, just until garlic becomes fragrant.
2. Before adding in San Marzano tomatoes, break them up by hand
    in separate bowl. Then add to the Dutch oven along with the
    chicken stock and salt.
3. Bring the soup to a boil and lower the heat. Simmer for 15
    minutes.
4. While soup is simmering, bring a medium pot of water to a boil 
    and cook pasta for 7 minutes.
5. Drain pasta and add to soup.
6. Cook for 8 more minutes, stirring frequently.
7. Make the slurry of corn starch and flax milk in a small cup.  Stir
    into the soup and continue to cook for 2-3 more minutes.

Serve with toast for dipping, or oyster crackers.  Or, if you want to be classic, make a grilled "cheese" sandwich with Follow Your Heart Vegan Mozzarella Cheese!  (use olive oil in place of bacon fat for a vegan soup)

I'm telling you, the balance of the smokiness from the bacon fat, the richness of the San Marzano tomatoes, and the small bit of heat from the crushed red pepper flakes will have you going back for seconds!  Enjoy!
.

 As always, from The Allergy Safe Kitchen, I wish you "Good Cooking, and Safe Eating"!
Tuesday, January 28, 2014

Leek tops - another valuable freebie!

One of my family's favorite winter dinners is Potato Leek Soup with homemade artisan bread.  The recipe calls for a lot of leeks, which leaves me with a counter full of beautiful bright green leek tops. I try to make the most out of each food item I purchase, so I always save my leek tops for making stock.  Here's how I do it!


Rise them just as you would the white tender part that gets cooked.  Fill a deep bowl with cold water.  Roughly chop the leeks and add them to the water.  Agitate them a bit with your fingers and then let them sit for 10-20 minutes while you give yourself a manicure. (Just making sure you were paying attention there...) The leeks will float and the dirt will sink to the bottom.


Lift the leeks gently from the water, place them on paper towels, and pat dry.
 
 
Look at all the dirt left in the bowl!  That definitely doesn't belong in my soup!

 
Portion the leeks out into several quart sized freezer bags.  I always label my bags with a "Use By" date so I don't end up with a freezer full of freezer burned foods.  (I have a full sized, stand alone freezer, so I'm pretty comfortable with 1-3 months for most of my frozen foods.)

 
Next time you are making stock, add a bag of frozen leeks instead of an onion! Leek tops are another valuable "freebie" in my kitchen!


 As always, from The Allergy Safe Kitchen, I wish you "Good Cooking, and Safe Eating"!

Friday, January 24, 2014

The Most Valuable Freebie in my Kitchen...

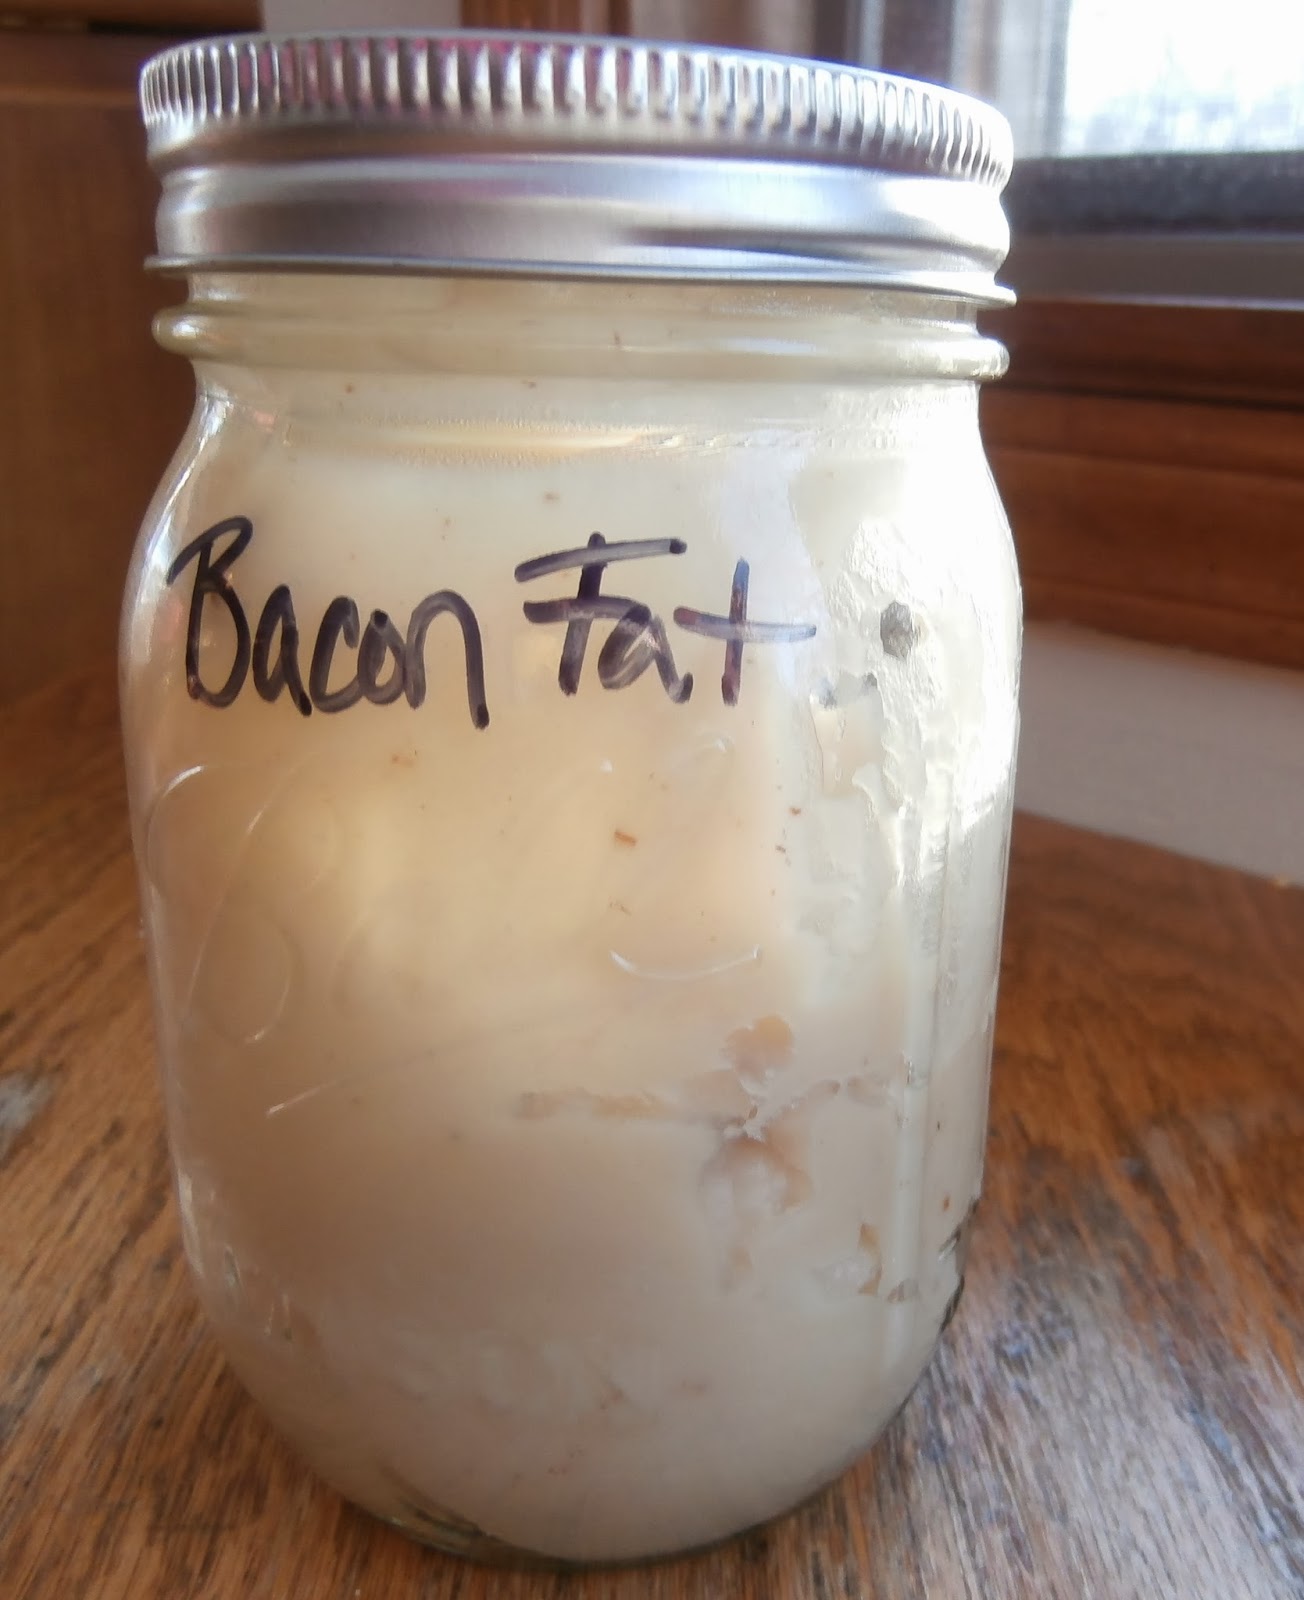
There is one food "freebie" that I use religiously in my kitchen.  It is...bacon fat!  I'm going old school right now, and suggesting that all of you, my dear readers, maintain a jar of bacon fat.  Once you start cooking with it, you'll be seeing that beautiful white deliciousness as culinary gold. 


To collect it, simply drain the fat out of the pan, or out of one of those nifty microwave bacon racks, into a heat safe container, I usually use a bowl.  Allow the fat to cool a bit before moving it to a mason jar.   Then, cover and store. I prefer to store mine in the fridge, but you could store it in the freezer if you have a copious amount that you won't use within a month or so.


There are two camps on whether or not to strain out the little brown bits from your bacon fat. Some cooks always strain it, and some never do.  If you are going to use it fairly quickly, I vote to leave those golden brown bits in for the extra flavor they bring to the party.  However, if you'll be storing the fat for a while, strain them out, as they contribute to turning the fat rancid more quickly. 


Apple Maple Chicken Sausage browned with bacon fat. 
Breakfast doesn't get much better than this.
 *I also suggest using organic bacon.  Yep, I used the "o" word.  Calm down, I know, I can hear you now..."It's so expensive!"  Yes, it is a bit more pricey than "regular" bacon, BUT, you are getting a quality product that does not contain synthetic chemicals, additional nitrites and nitrates, or GMO laden ingredients. AND if you save the rendered fat, you'll have beautiful organic cooking fat for other dishes. This is one instance where I recommend consistently buying organic.


 As always, from The Allergy Safe Kitchen, I wish you "Good Cooking, and Safe Eating"!